The secret to good wallpapering is thorough wall preparation.
If you’re wallpapering over new plaster, sanding the surface smooth and dusting it off is usually enough. Fill any dents or cracks with plaster or a synthetic filler.
Putting new wallpaper over old requires more work. First, address any surface defects — they will show through the new paper. Inspect the walls and reattach any old wallpaper that has peeled away, especially at the top, bottom, and corners.
Puncture bubbled areas and re-glue them. To check for peeling, run your hand over the wallpaper; even on a relatively smooth surface you may hear a crackling sound. Fill tears with filler. To remove old paper, wet it from top to bottom and peel it off with a putty knife, also working from top to bottom. Be careful not to damage the plaster underneath.
After removing old wallpaper, fill any remaining cracks and gaps as you would for any standard repair.
Paint the ceiling and the trim around windows and doors before you start hanging wallpaper. Only after the paint has dried should you begin applying the new paper. Use a plumb line to align the first vertical strip. If the walls are plastered, you can apply a layer of newspaper as a base for the wallpaper.
Gather the necessary tools: measuring tape, large scissors, a glue brush, a smoothing brush, a ladder, and a 6.5-foot board to lay the wallpaper on while you apply glue.
Accurately calculate how much wallpaper you need. The average roll is about 34.5 feet long. Measure from ceiling to baseboard for the room height, then measure the room perimeter and subtract the widths of doors and windows. Divide the roll length by the room height plus 2.4 inches to determine how many strips you can cut from one roll. If the wallpaper has a large pattern repeat, add extra length to each strip so the pattern matches.
Take all factors into account when doing the math. For example, if the room height is 7.5 feet plus 2.4 inches, that totals 7.6 feet, and if the pattern repeat is 1.6 feet, each strip should be 8.2 feet long to ensure the pattern aligns correctly.
From one roll you can cut: 34.5 feet ÷ 8.2 feet = 4 strips.
Divide the room perimeter minus doors and windows by the wallpaper width to find the number of strips needed. Then divide the total number of strips by the number of strips in one roll to calculate how many rolls to buy.
Save any large scraps to cover areas above windows and doors or behind furniture. Still, buy a little extra to avoid running short later — hidden defects may appear, or you might need to reapply sections.
When buying wallpaper, check all rolls for consistent color and shade.
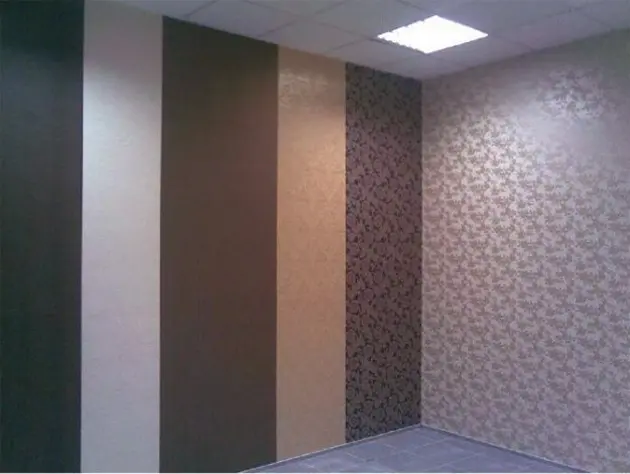
Check the vertical alignment of the walls with a plumb line. If the house has settled or a wall is tilted, striped wallpaper will look crooked in the corners.
Start with the first strip applied vertically using a plumb line. Also make sure any border is applied horizontally — use a level rather than marks on the ceiling and floor. If you cannot get the border perfectly horizontal, consider wallpaper with a bold pattern to disguise the issue.
Some wallpapers come with pre-glued edges, but still apply glue to the wall surface. Apply glue or paint the wall before installing vinyl wallpaper.
Prepare the glue according to the label, and while it sets, cut several rolls into strips. On a board or table, mark 6.5 feet (or make one-foot marks), starting from the left edge at a distance equal to the pattern repeat. Open the roll with the pattern facing up (end on the right) and, slightly overlapping the edge, smooth the strip so the wallpaper edge rests on the table edge. Mark the right edge of the strip with a crease and align the bottom of the first strip with it. Make the cutting line at a perfect right angle to the edge of the strip and align it with the table edge.
After unrolling the wallpaper to the left edge, mark with a light crease on the table edge where the second meter ends, then add the pattern repeat length (for example, 14.2 inches) so the edge aligns with the table. Fold the strip across its width and cut along the crease.
If the wallpaper does not require pattern matching, lay the next strip next to the first, measure its length using the first strip, and cut it. You can cut two or three rolls this way, producing 6 to 9 strips. If the wallpaper needs pattern matching, place the second strip next to the first and adjust it until the pattern aligns; then transfer that measurement to the following strips.
Roll all the strips in the opposite direction and turn them face down when you’re finished cutting.
Arrange the strips in a “stair-step” fashion before applying glue, shifting each strip to the edge of the table to avoid getting glue on the table and the front of the paper. Apply glue from the center to the edges. Fold the prepared right edge (bottom) of the strip toward the middle so the glued surfaces align. After aligning the edges, apply glue to the second half and fold it as well, joining the top and bottom of the strip. If the paper doesn’t absorb glue well, set that strip aside and glue another. Wallpaper that soaks up glue quickly should be applied to the wall right away or it may tear.
With the ladder set up, take the first strip by the middle with both hands. Climb the ladder and, keeping an eye on the top and right edges, place the top of the strip against the wall. The strip will straighten as it descends.
Align the right edge of the strip with the top of the door frame or with the vertical line you drew with the plumb line, keeping the left edge slightly away from the wall. Gently raise and lower the left side to line up the right edge. Press the top edge against the wall with a brush and smooth the wallpaper with diagonal strokes starting from the right corner. For the lower folded section, separate it from the wall, align it, and adhere it using upward and sideways strokes. Press the lower part firmly against the baseboard, mark a line with scissors, tear off the excess, cut along the marked line, and then adhere the final edge to the wall.
If the door frame isn’t perfectly vertical (check in advance with a plumb line), align the left uncut edge of the first strip with the vertical line on the wall so the maximum distance between that line and the door equals the width of the cut strip.
To cut a strip along a diagonal near doors, follow the same method as when trimming at the baseboard. The first strip must be perfectly vertical because all subsequent strips align to it. Apply the second strip the same way, aligning its left edge to the right edge of the first.
If the strips are cut accurately, installation becomes straightforward. Take your time. Pay special attention to corners: measure the distance between the edge of the last applied strip and the corner at several heights and use the largest measurement. Mark and trim the strip at several points along its length, adding 0.2 inches so it overlaps slightly into the corner.
For windows and doors, wallpaper that doesn’t require pattern matching is applied the same way as in corners. Finally, wallpaper above and below doors and windows, matching the pattern where necessary.
Cracks often form around doors because the wood wasn’t fully dry. To prevent future cracking, glue a strip of thin paper soaked in clean water over the area before applying wallpaper. Immediately apply the wallpaper over the paper. As it dries the wallpaper will stretch slightly and any potential cracks will form in the paper layer rather than tearing the wallpaper.
For switches and outlets recessed in the wall, remove the protective plates, apply the wallpaper, cut openings, and reattach the plates. Remove switches without wooden backing carefully to avoid damaging wiring. After applying the wallpaper, reattach the switch in its original position.
For old switches with wooden backing, cut the wallpaper in the center, make several radial cuts, fold the edges back, and press them against the wall. Trace the switch outline with the tip of scissors, fold the edges away from the wall, cut, then glue the edges back down.
Apply wallpaper carefully behind radiators. Cut a strip the width of the radiator plus an extra centimeter on each side. Place the strip on the wall, lower it behind the radiator, cut at the level of the mounting bracket, then adhere it.
If wallpaper gets glue on it, clean the stain with a damp sponge, taking care not to disturb the texture or color.
Wait a short time between applying glue to the wallpaper and sticking it to the wall. The better the paper soaks up glue, the less likely it is to peel later.
If a crease forms during application, peel the strip off immediately and reapply it.
Don’t rush to judge your work right away. Wallpaper will fully dry, stretch, and restore its color the next day.