 The oval, bone‑in cutlet—made from pounded or minced chicken fillet wrapped around cold herb butter, breaded, and deep‑fried—is known in Germany as the “Meat Princess,” in Italy as “graceful meat,” and in France as “airborne chicken.”
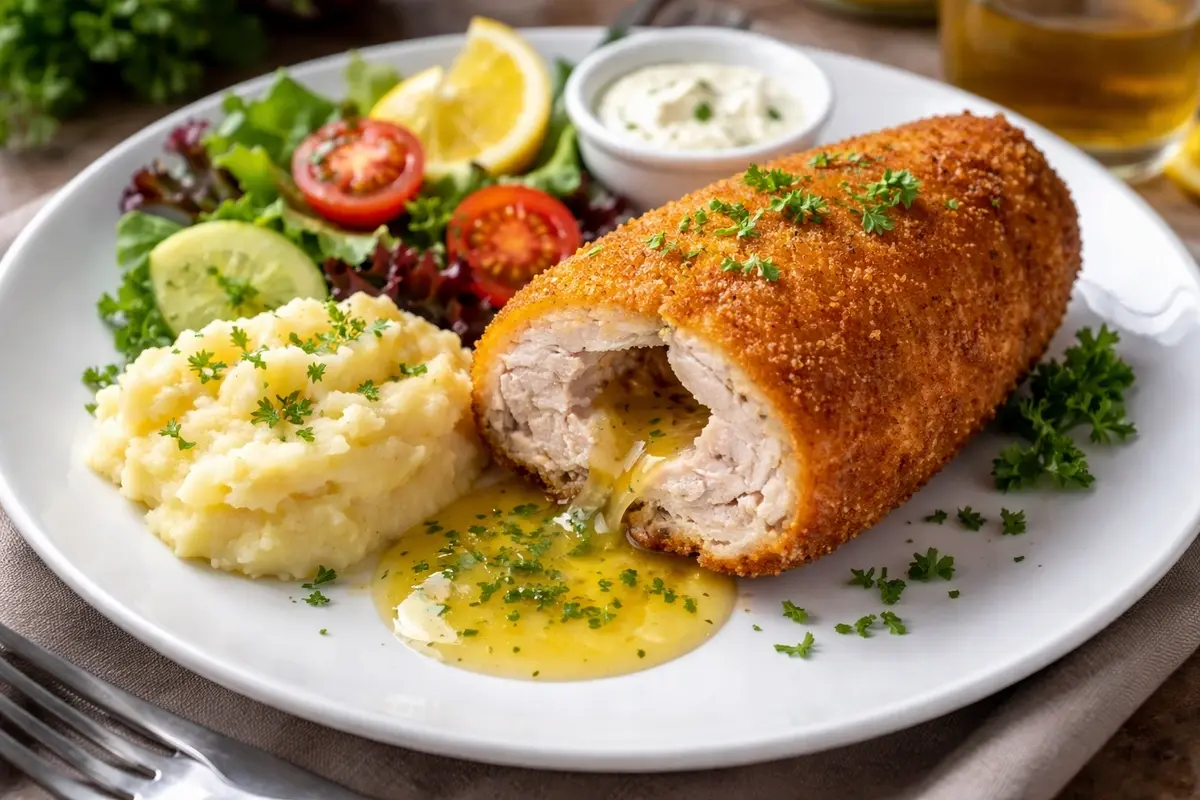
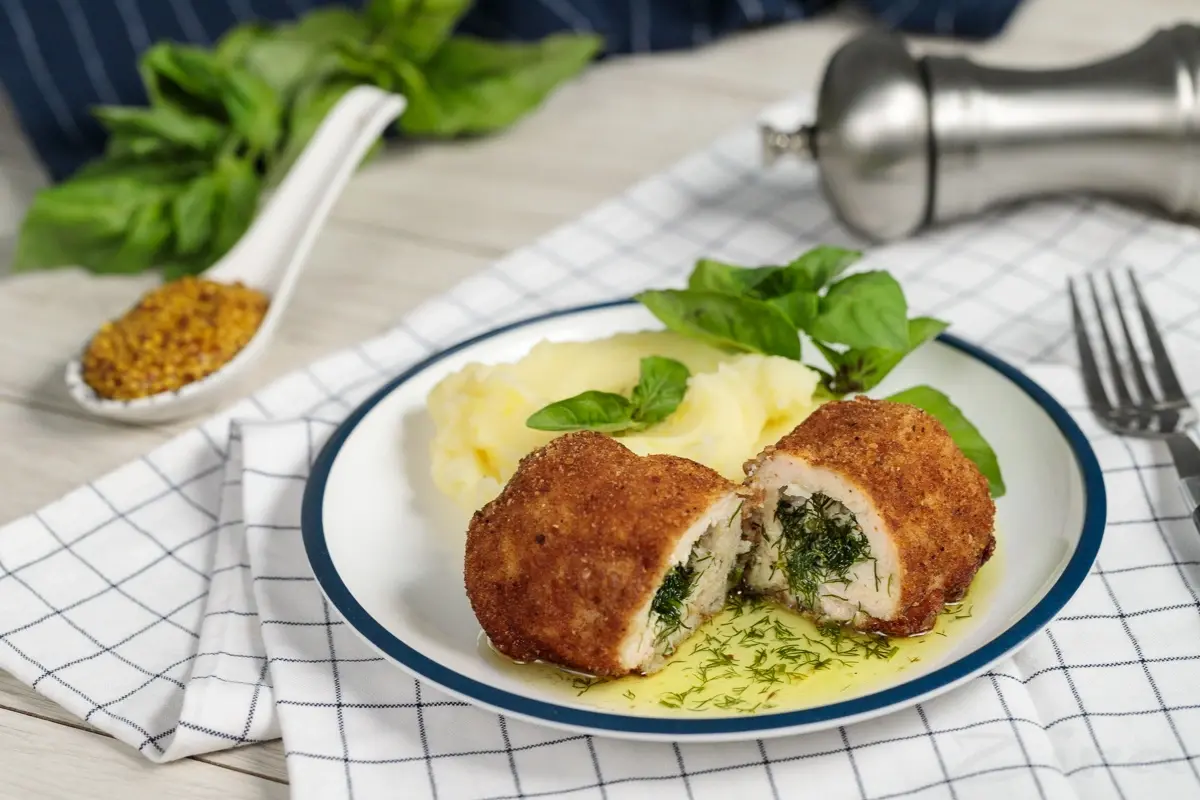
The original name of this popular dish is Chicken Kiev. It features a crispy crust and a juicy filling that oozes out when cut. While classic Chicken Kiev is made from chicken fillet, you can easily prepare this delicacy at home in the oven or in an air fryer.
Ingredients:
- chicken fillet – 2 pieces (or minced meat – 500 g);
- frozen butter (82% fat) – 80 g;
- chopped herbs (dill, parsley, green onions) – 2 tbsp;
- salt, pepper, paprika – to taste;
- flour – 50 g;
- breadcrumbs – 100 g;
- for the batter: 2 eggs and 2 tbsp milk or water.
What is Batter and Why is it Necessary?
The secret to that “armor‑plated” crispy crust that keeps the butter inside is quality breading. For this, we use batter (from the French word liaison — connection). Batter is a mixture of beaten eggs with a small amount of liquid (milk, cream, or water) and a pinch of salt. The batter creates a reliable layer that binds the breadcrumbs together and prevents the juices from leaking out during frying. Cooks still debate the best liquid to use—milk, cream, or water—so try each to see which you prefer in your dishes.
How to Make Chicken Kiev: Step-by-Step Instructions
- Prepare the meat. Divide the chicken breast into large and small fillets, remove the tendons, and pound the meat through plastic wrap. If you’re making Chicken Kiev from minced meat, bind and chill the mince so the meat holds its shape around the butter.
- Filling. Mix the softened butter with the herbs, shape the mixture into small logs, and place them in the freezer for 10–15 minutes. The butter must be firm.
- Shaping. Wrap the cold butter in the prepared fillet (or in the chilled minced meat) in an oval shape. Make sure there are no holes.
- Double breading. This is a critical step: coat the cutlet in flour, then in the batter, followed by breadcrumbs, dip it back in the batter, and finish with a final layer of breadcrumbs.
- Cooking. Quickly fry the cutlets in hot oil (about 5 minutes) until golden brown, then finish cooking in the oven for 10–15 minutes at 180°C. Serve Chicken Kiev with mashed potatoes, green peas, or on toast (croutons).
Secrets of Juiciness: Tips from the Author
To ensure your “Meat Princess” turns out perfect, follow these tried‑and‑true tips:
- Freeze the butter twice. Freeze the herb butter first, and then freeze the formed cutlet for about 20 minutes before breading. This helps prevent the filling from leaking out during cooking.
- Use an air fryer for a lighter version. A good air fryer or convection oven circulates hot air to create a crispy crust while keeping the inside juicy. That lets you cook with almost no oil and cut calories.
- Control the temperature. Don’t skip the quick initial fry before finishing in the oven—this step helps “seal” the meat and keeps the juices inside.