To successfully apply wallpaper, it’s essential to thoroughly prepare the wall surface.
If you’re applying wallpaper over new plaster, simply sanding the surface to make it smooth and dusting it off will suffice. Any dents or cracks should be filled with plaster or a synthetic-based filler.
When applying new wallpaper over old, more effort is required. First and foremost, you need to address any surface defects, as these will become apparent once the new wallpaper is up. Inspect the walls and reattach any old wallpaper that has peeled away, especially at the top, bottom, and corners.
In areas where the wallpaper has bubbled, it should be punctured and re-glued. To check for peeling, run your hand over the wallpaper; even on a relatively smooth surface, you should hear a crackling sound. Tears in the wallpaper should be filled with filler. Old wallpaper can be removed by wetting it from top to bottom. Use a putty knife to peel it off, also from top to bottom, being careful not to damage the plaster underneath.
After removing the old wallpaper, fill in any cracks and gaps just as you would during a standard repair.
Next, you should paint the ceiling and the trim around windows and doors. Only after that can you start applying the new wallpaper. The first vertical strip should be aligned using a plumb line. If the walls are plastered, you can apply a layer of newspaper as a base for the wallpaper.
Before starting the work, it’s advisable to gather all necessary tools: a measuring tape, large scissors, a brush for applying glue, a smoothing brush, a ladder, and a 6.5-foot board to lay the wallpaper on while applying glue.
It’s crucial to accurately calculate how much wallpaper you need. The average length of a roll is about 34.5 feet. Measure the distance from the ceiling to the baseboard, then measure the perimeter of the room, subtracting the widths of doors and windows. By dividing the length of the unrolled wallpaper by the height of the room plus 2.4 inches, you can determine how many strips you need to cut from the roll. If the wallpaper has a large pattern, the amount needed for each strip increases, as you’ll need to ensure the pattern matches up.
All of this must be taken into account during your calculations. For example, if the height of the room is 7.5 feet plus 2.4 inches, that totals 7.6 feet, and if the pattern repeat is 1.6 feet, then each strip of wallpaper should be 8.2 feet long to ensure the pattern aligns correctly.
From one roll, you can cut: 34.5 feet divided by 8.2 feet equals 4 strips.
So, by dividing the perimeter of the room, minus the doors and windows, by the width of the wallpaper, you can determine the number of strips needed. Finally, dividing the total number of strips by the number of strips in one roll will tell you how many rolls you need.
If there are significant scraps left over from each roll, they can be used to cover areas above windows and doors or behind furniture. However, it’s wise to have a bit of extra wallpaper on hand to avoid complications later on; hidden defects may emerge, and you might need to reapply some sections after a while.
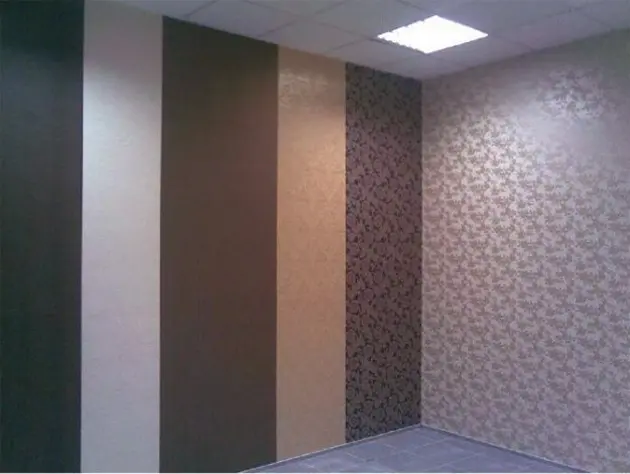
When purchasing wallpaper at the store, be sure to check all rolls for color and shade consistency.
It’s also advisable to check the vertical alignment of the walls with a plumb line; if the house has settled or the wall is tilted, striped wallpaper won’t work well, as it will appear crooked in the corners.
As mentioned, the first strip should be applied vertically using a plumb line. It’s equally important that the border is applied horizontally. Use a level to ensure the line is straight, rather than relying on marks on the ceiling and floor. If the border cannot be applied horizontally, it’s best to choose wallpaper with a bold pattern.
Some wallpapers come with pre-cut edges that are already glued, but even then, you should apply glue to the wall surface. You should also apply glue or paint the wall surface before putting up vinyl wallpaper.
Prepare the glue according to the instructions on the label, and while it sets, cut several rolls into strips. On a special board or a table of appropriate size, mark 6.5 feet (or make one-foot marks), starting from the left edge at a distance equal to the pattern repeat. Open the roll with the pattern facing up (the end on the right) and, slightly overlapping the edge, carefully smooth out the strip so that the edge of the wallpaper rests on the edge of the table. Mark the right edge of the strip with a crease and align the bottom of the first strip with it. The cutting line should be at a perfect right angle to the edge of the strip and align with the edge of the table.
After unrolling the wallpaper to the left edge, mark with a light crease on the edge of the table where the second meter ends, and then add an additional 14.2 inches, which corresponds to the pattern repeat, ensuring that the edge aligns with the edge of the table. Fold the strip along its entire width and cut along the crease.
If the wallpaper does not require pattern matching, lay the next strip next to the first, measuring its length according to the first and cutting it. You can cut two or three rolls this way, resulting in 6 to 9 strips. If the wallpaper needs to be matched, the second strip should be placed next to the first, adjusting it until the pattern aligns. This measurement is then transferred to the following strips, ensuring the pattern matches.
Once you’ve finished cutting the wallpaper, roll all the strips in the opposite direction and turn them face down.
Before applying glue, arrange the strips in a “stair-step” fashion, shifting each strip to the edge of the table to avoid getting glue on the table and the front surface of the wallpaper. Apply glue from the center to the edges. The prepared right edge (bottom) of the strip is folded at both ends to the middle so that the glued surfaces align. After aligning the edges, apply glue to the second half of the strip and fold it as well (the top and bottom of the strip are now joined). If the glue does not absorb well into the wallpaper, set the glued strip aside and apply glue to another. Wallpaper that absorbs glue quickly should be applied to the wall promptly, or it may tear.
Now the first strip is ready. With the ladder set up, take the strip by the middle with both hands. Climb the ladder and, keeping an eye on the direction of the top edge and the right edge, place the top part of the strip against the wall. The strip will gradually straighten as it descends down the wall.
Align the right corner of the strip with the top of the door frame or with the vertical line drawn using the plumb line. Meanwhile, keep the left corner slightly away from the wall. By gently raising and lowering the left side, align the right edge of the strip. After that, press the top edge against the wall with a brush and adhere the wallpaper using diagonal strokes starting from the right corner. For the lower part of the strip that remains folded, separate it from the wall, align it, and adhere it using upward and sideways strokes. Firmly press the lower part of the strip against the baseboard, mark a line with scissors, tear off the lower part of the strip, cut along the marked line, and then finally adhere it to the wall.
If the door frame is not perfectly vertical (this should be checked in advance with a plumb line), align the left, uncut edge of the first strip with the vertical line drawn on the wall, ensuring that the maximum distance between this line and the door equals the width of the cut strip.
To cut a strip along a diagonal line near the doors, do it the same way as when applying wallpaper above the baseboard. It’s crucial that the first strip is applied vertically, as all subsequent strips will be aligned to it. The second strip is applied just like the first, but it should be aligned with the left edge of the right strip.
If the strips are cut accurately and correctly, applying them is not difficult. Take your time. It’s important to apply the wallpaper well in the corners. To do this, measure the distance between the edge of the last applied strip and the corner of the wall. If the wall surface is not entirely smooth, measure this distance at several levels and choose the largest one. Trim the edges of the strip, marking it in several places with the known measurements, and cut the strip along its entire length, adding an extra 0.2 inches to ensure the strip overlaps slightly into the corner.
For windows and doors, wallpaper that does not require pattern matching is applied in the same way as in the corners. Finally, apply wallpaper above doors and windows, as well as below them, ensuring the pattern matches.
Cracks often appear around doors. This is usually because the wood was not sufficiently dry. To conceal future defects, before applying wallpaper around doors, glue a strip of thin paper soaked in clean water. Immediately apply the wallpaper over the paper. As it dries, the wallpaper will stretch slightly and may pull away from the wall in some areas, where cracks could form, thus preventing tearing.
If switches and outlets are embedded in the wall, remove the protective plates, apply the wallpaper, cut out the openings, and reattach the plates. Switches without wooden backing should also be carefully removed to avoid damaging the wiring. After applying the wallpaper, reattach the switch in its original position.
For old switches with wooden backing, cut the wallpaper in the center, make several cuts in a radius, fold the edges of the wallpaper back, and gently press them against the wall. Outline the switch’s contour with the tip of the scissors, fold the edges away from the wall, and cut them, then glue the edges back down.
It’s also important to carefully apply wallpaper behind central heating radiators. Cut a strip to the width of the radiator, adding an extra centimeter on each side. Place the strip on the wall, lower it behind the radiator, and cut at the level of the bracket that holds the radiator to the wall, then apply it.
A few more tips: If the wallpaper accidentally gets glue on it, clean the stains with a damp sponge, being careful not to disturb the texture or color.
It’s essential to maintain a gap between applying glue to the wallpaper and adhering it to the wall. The better the wallpaper is saturated with glue, the less likely it is to peel away.
If a crease forms during application, the strip should be immediately peeled off and re-adhered.
Don’t rush to evaluate the quality of your work right after finishing. The wallpaper will only fully dry, stretch, and restore its color the next day.